Subtotal $0.00
How to Install AI LLM Locally: Step-by-Step Guide
Introduction
Installing an AI LLM (Large Language Model) locally can significantly improve your workflow, whether you’re a developer, researcher, or tech enthusiast. This guide walks you through how to install AI LLM on your local machine efficiently, ensuring privacy, speed, and flexibility in your generative AI projects.
Why Run a LLM Locally?

Before diving into the installation, it’s important to understand the benefits of running a Large Language Model locally:
- Privacy and Data Security – Your prompts and results stay entirely on your machine.
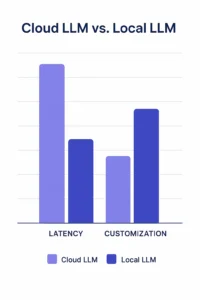
- Low Latency – No network delays, ensuring faster response times.
- Customization – Fine-tune or modify the model for your specific use case.
- Offline Access – Great for remote environments or disconnected systems
Prerequisites for Installing AI LLM Locally
Make sure your system is ready. Here’s what you need:
- Operating System: Linux, macOS, or Windows (with WSL recommended)
- Python: Version 3.8 or above
- GPU (Optional): NVIDIA GPU with CUDA Toolkit for faster inference
- Disk Space: At least 10–20 GB, depending on the model
You should also be familiar with Python and the terminal/command line.
Step-by-Step Guide to Installing AI LLM Locally
Step 1: Choose the Right Open-Source LLM
There are several high-quality open-source models available. Some of the popular ones include:
- LLaMA 2 by Meta : High performance (requires access request)
- Mistral : Fast and lightweight, great for local inference
- Gemma by Google : Versatile and optimized for fine-tuning
- https://ai.google.dev/gemma : Beginner-friendly with GUI and CLI
We recommend starting with GPT4All or Mistral for their ease of installation and active community support.
Step 2: Install Required Dependencies
Start by setting up a Python virtual environment and installing key packages:
sudo apt update
sudo apt install python3-venv python3-pip -y
python3 -m venv llm-env
source llm-env/bin/activate
pip install torch transformers accelerate
If you’re using a GPU, install CUDA-enabled PyTorch using the appropriate command from the PyTorch Installation Guide .
Step 3: Download and Set Up the Model
Let’s assume you’re using GPT4All. You can install it via the CLI:
pip install gpt4all
Then, download a model (e.g., gpt4all-lora-quantized) from the GPT4All Model Zoo.
Alternatively, for transformer-based models, use:
from transformers import AutoModelForCausalLM, AutoTokenizer

model_name = "TheBloke/Mistral-7B-Instruct-v0.1-GGUF" # Replace with your desired model
tokenizer = AutoTokenizer.from_pretrained(model_name)
model = AutoModelForCausalLM.from_pretrained(model_name)
Step 4: Run and Interact with the Model Locally
Now, you can write a basic prompt interface to test the model:
input_text = "Explain how machine learning works"
inputs = tokenizer(input_text, return_tensors="pt")
outputs = model.generate(**inputs, max_new_tokens=200)
print(tokenizer.decode(outputs[0]))
If you’re using GPT4All, you can also use its built-in GUI or CLI:
gpt4all-lora-quantized --interactive
Step 5: Optional GUI and API Integration
To make things even more interactive, consider adding:
-
-
Text Generation Web UI – Easy-to-use browser UI
-
Gradio – Build a custom local chatbot using:
-
pip install gradio
import gradio as gr

def chat(input):
return model.generate(...)

gr.Interface(fn=chat, inputs="text", outputs="text").launch()
Troubleshooting Common Issues
Encountering errors? Try these fixes:
- Ensure your Python version is correct (3.8+)
- If the model won’t load, try a quantized version like GGUF
- Check RAM and disk space—some models need 16 GB+ memory
- Verify your CUDA drivers from NVIDIA Toolkit if using a GPU
- Search for help in GitHub Issues or Discord communities by exploring issues in specific model repositories.
Tips to Improve Performance
- Use quantized models (e.g., GGUF) to reduce RAM usage
- Keep the model in a virtual environment to avoid conflicts
- Monitor system load with tools like
htopornvidia-smi
Conclusion
Installing an AI LLM locally is no longer a complex task. With this guide, you’ve learned how to set up everything from dependencies to model inference. Whether you’re building an AI-powered app, testing models offline, or valuing privacy, installing AI LLM locally puts you in full control of performance and data security.
By running LLMs directly on your machine, you reduce latency, gain offline access, and avoid cloud-related limitations. As local deployment becomes more accessible, now is the perfect time to install AI LLM locally and start exploring real-world AI applications at your own pace.

